
Cheap PCB Assembly w/ JLC
How to be a cheap bastard and still get assembled prototypes fast
The goal of this post is to familiarize you with how JLC takes your dollars and how you can hold on to as many of them as you can. I'll give you a bunch of tips, as well as a workflow that I commonly use to get the cheapest results. I like to iteratively design, and I don't have the space, equipment, time, focus, or steadiness to reliably assemble semi-complex SMD and BGA boards. I also want to point out that this is primarily for prototyping, not final production.
Our goal is 5 assembled prototypes, delivered to your door, for less than $70 (wow!)
Ordering constraints
Behold, the holy grail of being economic with JLC: Global Standard Direct Line Shipping
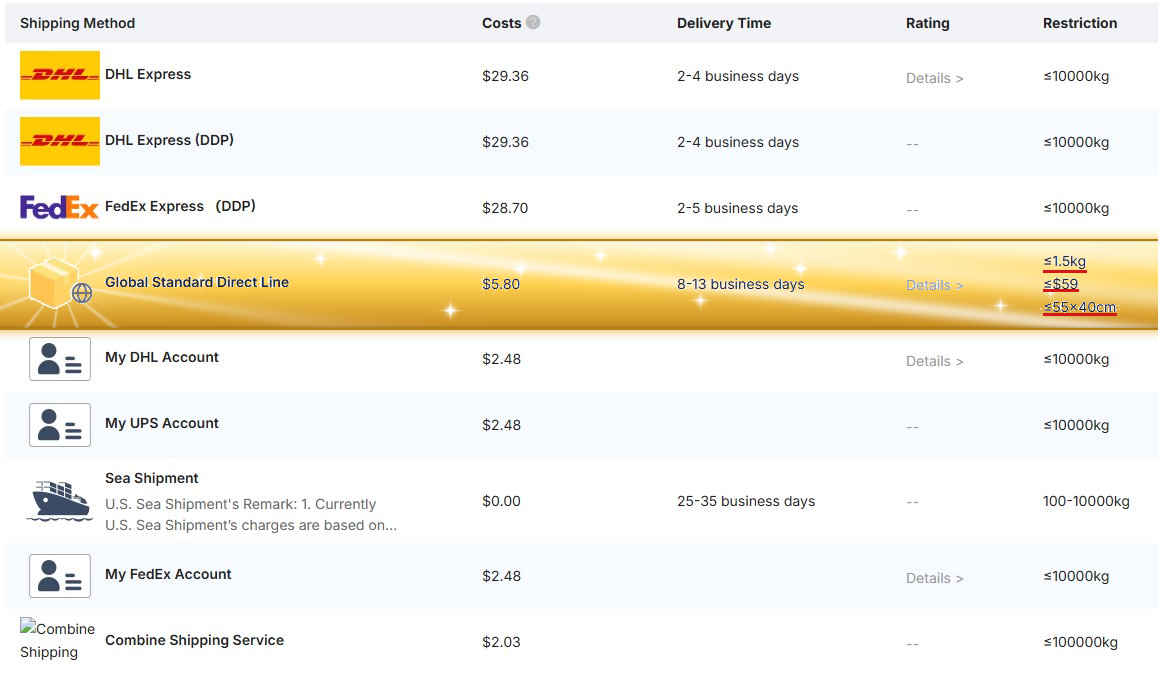
This is JLCs best option with the heaviest restrictions. You can effectively get 5 assembled (or mostly assembled) prototypes delivered to your home for less than $70. I consider this a great deal. JLC does not collect tariffs for orders that are under $60 and go through Global Standard Direct.
Extra info: https://jlcpcb.com/shipping
Extra info: https://jlcpcb.com/help/article/us-tariff-policy-faq
- Your order must be ≤1.5Kg (note: JLC will way over-estimate weight)
- Your total price for the order (PCBs and assembly) must be ≤$59
- Your board size must be ≤55x40cm (which is plenty enough for most of us to even do our own mouse-bite panelized designs if component costs are low or final assembly is done by you)
Economic PCBs (for assembly)
For Economic PCBA, your PCB itself is restricted. I recommend reading more into the Extra Info for this section as it covers exact specifications. Below are some rules of thumb Extra info (read this for specifics): https://jlcpcb.com/capabilities/pcb-assembly-capabilities
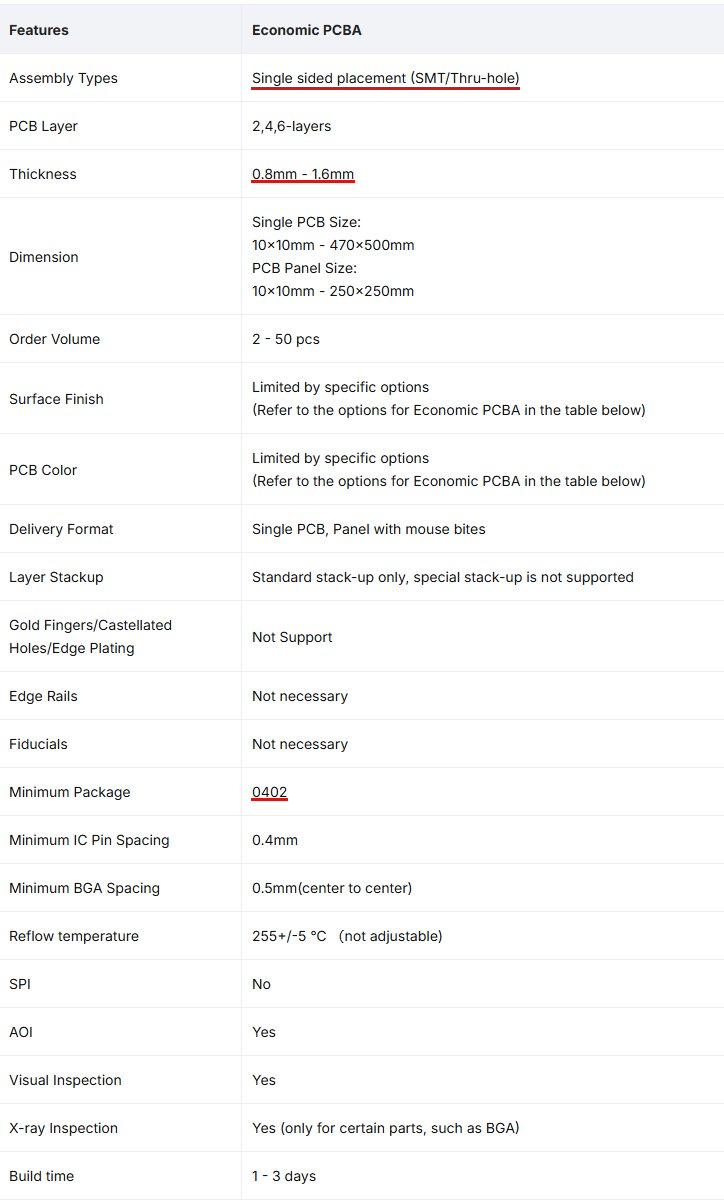
- When designing your PCB, you will have to do single-sided assembly - you cannot do both sides. If your design requires components on both sides, design for final assembly to be done by you. Put the majority (everything you can) of your components on the side you are having assembled.
- When doing your board stackup, stick to a 2 layer design if possible. If you must use 4 layers, know that it will eat into your $59 budget a good bit.
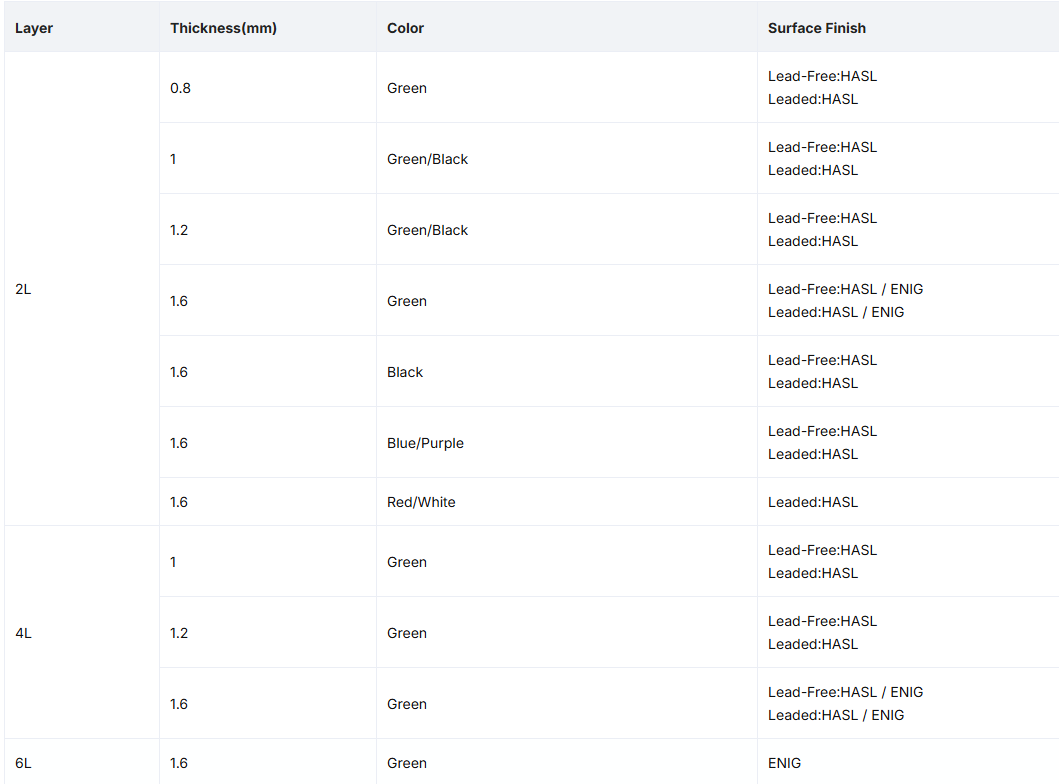
- Stick to a HASL finish unless you NEED ENIG. ENIG will eat into your budget and it limits you to only green solder mask. Consult the "PCB Specs for Economic PCB Assembly" graphic/page.
- You can use any silkscreen color as long as your board is 1.6mm (default). If you need thinner boards, you are restricted to green and black.
- You cannot do castellated holes or edge plating.
Economic Parts and Assembly
Once your board specs qualify for Economic, single-sided assembly, you're going to have to do a lot of back and forth with your BOM and the JLCPCB Parts website. JLC's PCBA library is built on-top of LCSC - a Chinese parts company like mouser/digikey.
There are tools that make the process of importing components from JLC/LCSC/EasyEDA into Kicad much easier, as well as generating drag-and-drop gerbers and BOM/Position files specifically for JLC.
Tool that imports libraries (footprints and symbols) from EasyEDA (and other part platforms): Impart GUI for Kicad Tool that makes exporting gerbers and assembly files into Kicad easy: Fabrication Toolkit
The important thing to note, is that you are going to need to keep track of LCSC part # for all of your components. When you import a component using Impart GUI, the LCSC part # field will already be populated. You can add this field as a default for all components, through your Kicad preferences. When selecting parts for cheap assembly, there are two qualifiers you need to pay attention to. Parts type, and PCBA Type
Parts type (basic vs extended parts)
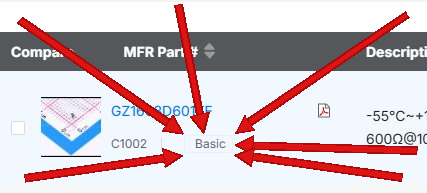
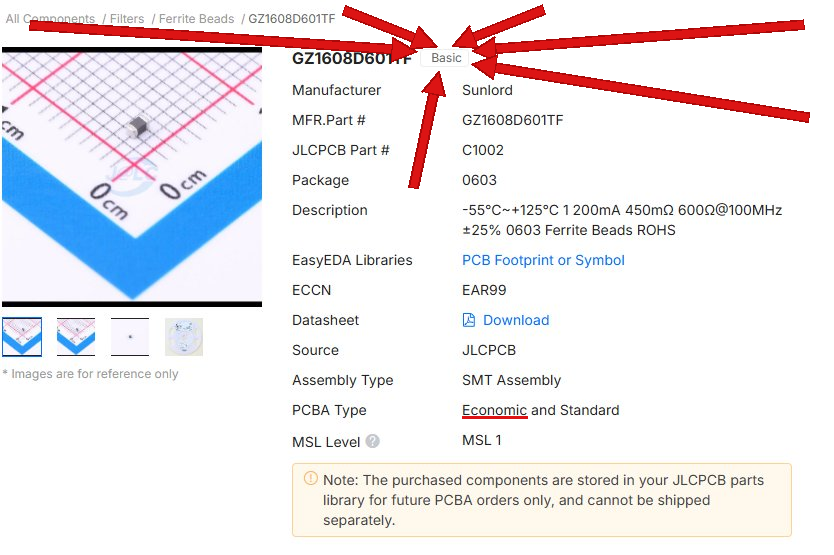
Parts type relates to setup costs. JLC maintains a library of basic parts, mostly passive components, that require a very minimal setup fee per part and are very commonly loaded and used. Your design should use as many of these Basic parts as you possibly can. It's okay to swap out resistor/capacitor sizes and values to use a basic part. Each non-basic part that you use incurs a per-part setup fee, which will stack up quickly at $3/extended part loaded. Often the largest single cost of my cheap orders is setup fees for the feeders, and specifically for non-basic components.
Economic PCBA parts
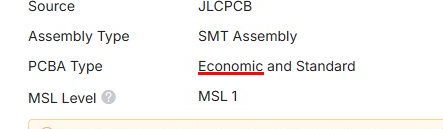
In addition to using basic parts, every single part you use (basic or extended) must qualify for Economic PCBA. Parts type (basic vs. extended) relate to per-component feeder costs. PCBA Type is the qualifier for Economic PCBA. Every single part in your assembly BOM must qualify for Economic assembly. If you have a critical component that does not qualify for Economic PCBA, you must remove it from your order and solder it yourself, or find a suitable replacement that does qualify. PCBA Type mainly refers to how difficult the component is to solder. Small components (like the WS2812 1515) are much more difficult for assembly, and they will gate these components behind Standard Assembly setup costs.